header
blog

Hi, Amanda from baci designer stationery + events here! When I saw Jacin write about starting this new series, I just knew I had to share our three days of family (and food!) filled traditions. My husband, Ilario, and I live close to his family, but about three hours from mine, so it can be tricky to plan out time with each group, but after seven years together we’ve got it nailed down pat ;)

The festivities start on “Christmas Eve Eve” as we like to call it, when we eat a giant feast of pot roast, drink homemade Irish Cream and spend time with our best friends, The Moore Family. My dear friend married Ilario’s best high school buddy and now their entire family has essentially became ours - we couldn’t image the holidays without all of them!  On Christmas Eve we start the fun at my husband’s parents’ house where we eat homemade zeppole, an Italian doughnut, straight from the pan with sardines for the salt lovers or coated in powdered sugar, our nephews’ favorite treat! After we’ve stuffed ourselves to the gills with fried dough we start on the meatless, seafood meal - this is a tradition my husband’s Italian family has continued to uphold since his grandparents and parents came to America. As the evening progresses we open presents - my husband and I started a tradition of gifting our nephew’s special Hallmark Christmas ornaments each year, a tradition my grandmother started with me and my cousins when we were very little. My mom has even started doing the same with our immediate family, it’s so much fun to to look back at the ornaments from each year!

Christmas morning Ilario and I wake up at the crack of dawn, we pack up the car and hop on the road for the drive to my mom and dad’s. Our kitty, Morris even gets to come along each year - he loves spending the holidays exploring my parents’ house! It’s such a great ride with few people on the road and Christmas tunes blaring on the radio! It’s even more wonderful if we get a few Ohio flurries on the way!!


{Morris on his very first Christmas at my parents’ house - 2009}

We really look forward to sharing these traditions with our future children and maybe even adding a few new ones of our own.  And so you, too, can enjoy a small part of our holiday food-filled joy, I’m sharing my mother-in-law’s zeppole recipe!  She doesn’t really measure or write down actual recipes, lol, so feel free to tweak as you see fit since these measurements are strictly estimates.

Cursaro Family Zeppole

Ingredients
5 lbs flour
4 cups instant mashed potatoes mixed with enough water to make them slightly runny
1 t. sugar in warm water, add 5 - 6 t. yeast until foamy
1/4 cup salt
vegetable oil
warm water

Directions

  1. Place flour in a large bowl, add watery instant mashed potatoes and mix well.
  2. Add foamy yeast/sugar mixture.  Add more water and a bit of vegetable oil until you reach a doughy consistency.  Add more flour if it becomes too soft.
  3. Work dough, adding air into it so it’s nice and fluffy.  Cover bowl with plastic wrap or a plastic bag and set aside - this will save you time working the dough.  Repeat and cover again with plastic to let the dough rise.
  4. When dough has finished rising, place into a clean well oiled bowl.  Fill a small bowl with oil to dip your fingers in so the dough doesn’t stick to your fingers.
  5. Fill a frying pan 3/4 full of vegetable oil - heat oil until a small piece of dough rises to the top and browns in a couple of minutes.
  6. Pinch a bit of dough, quickly spread it or stretch it then carefully place it into the hot oil.  Dough will rise to the top, when it’s golden brown flip over and repeat on the other side.
  7. Serve zeppole while it’s still hot sliced with an anchovy in the middle, with olives on the side or coated with a dusting of powdered sugar.

Enjoy and Happy Holidays!!

Today’s holiday tradition comes to us from the lovely, sweet and kind Brit of Brit Stewart Weddings and Landlocked Bride. Today is a super special day for Brit, because her wedding has been featured in the Spring / Summer 2012 issue of The Knot: Missouri / Kansas! So leave her some love today, will you? Take it away, Brit :)

I am so excited to be guest blogging for Jacin. When she said she was looking for holiday traditions, I couldn’t help but want to share my sugar cookies. They have been a tradition my Mom and I have shared over Christmas for as long as I can remember.

Being an only child, that time in the kitchen with my Mom every Christmas was something I have always treasured. And, having not lived at home for quite some time, I still make it a point to make a couple dozen or so of our favorites just to bring back old memories.

Each Christmas we would make our staples: peanut butter, peanut butter with Hershey kisses, chocolate chip, oatmeal raisin. We also had a few new ones every year, like: peppermint patties, pumpkin cookies, lemon cookies, gingerbread, and jelly tart cookies.

But, my absolute favorite was our sugar cookie. It is a modified recipe my Mom and I came up with after having found one from a cookbook (we use less butter and salt than the original). Just the entire process (though tedious) was so much fun. We would bond, tell stories and laugh with every cookie we cut. In fact, it was so much fun that it lead to the growth of my crazy cookie cutter collection, which happens to be over 200.

I love rolling the dough, cutting the shapes, topping the cookies with colored icing and sprinkles. These cookies were (and still are) my pride and joy, which I want to share with you!

INGREDIENTS
Sugar Cookies

  • 1 1/2 c. powdered sugar
  • 1/2 to 3/4 c. butter (softened)
  • 1 t. vanilla
  • 1/2 t. almond extract
  • 1 large egg
  • 2 1/2 c. all-purpose flour
  • 1 t. baking soda
  • 1 t. cream of tartar

Icing

  • 2 c powdered sugar
  • 1 egg white
  • 1/2 teaspoon vanilla
  • Milk

RECIPE:
Sugar Cookies:

  1. Mix powdered sugar, butter, vanilla, almond extract and egg in a large bowl.
  2. Stir in remaining ingredients.
  3. Cover and refrigerate for at least 2 hours (If you’re in a hurry, you can stick it in the freezer for an hour).
  4. Heat oven to 375 degrees.
  5. Roll dough out and use cookie cutters to make shapes
  6. Bake about 6-8 minutes depending on how thin your cookies are.
  7. Pull cookies and transfer them immediately to a cooling rack to cool.
  8. Ice the cookies after they have cooled completely.

Icing Recipe:

  1. Beat the powdered sugar, egg white and vanilla with an electric mixer using the whisk attachment; add milk as necessary (I like to keep my icing a little on the thicker side - prevents it from dripping down the sides of the cookies).
  2. Add food coloring.
  3. Use a pastry bag, pastry brush or a spoon to decorate cookies.

I now use a modified version since I am vegan, which I found thanks to Ms. Betty Crocker. I usually make one modification in her recipe by reducing the amount of butter / margarine by 1/4 c.

And, once your cookies have cooled and the icing has dried completely, store them in an airtight container using wax paper or parchment paper to separate each layer. And, the best two pieces of advice I can offer are to have a blast making these cookies and new memories, and place a slice of fresh bread in the airtight container with the cookies (on a separate piece of parchment paper). It’ll keep them nice and soft. Yum!


{via}

One of the best parts about Thanksgiving feast is the leftovers, am I right? In our house, I always put the leftover turkey to good use, once all the sandwiches have been made, and make turkey pot pie! It is so delicious, and perfect for a night cozied up by the fire during the long weekend. I have to say I take no credit for this recipe, for it came from my cousin Courtney - she’s the mastermind, I just swapped it out with turkey :)

Courtney’s Pot Pie Recipe

1/3 c. butter
1/3 c. a-p flour
1/3 c. chopped onion
1/2 t. salt
1/4 t, pepper
1 3/4 chicken broth, I use the bouillon cubes
2/3 c. milk
2 c. cooked, cubed chicken (in this case, swap out with turkey!)
1/2 pkg. frozen peas
about 1 c. fresh peeled and chopped carrots

Heat butter over low heat until melted. Blend in flour, onion, s & p. Cook over low heat, stiring constantly, until mixture is smooth & bubbly; remove from heat. Stir in broth and milk. Heat to boiling, stirring kind of constantly. Boil & stir 1 minute. Stir in chicken (turkey) and veggies, reserve. Ease pastry into square pan, 9x9x2″ (or thereabouts); pour chicken filling into pastry lined pan. Roll remaining dough into an 11″ square (something like that); place over filling. Roll edges under; flute. Cut slits in center to allow steam to escape. Cook uncovered in 425 degree oven until crust is brown, 30 to 35 minutes. The last few times I beat an egg and brushed the crust the last 10 minutes, it makes it look golden and PERFECT.

Enjoy!

You know what’s funny - out of all the posts I’ve put together this one remains one of the most popular, which to me is hilarious because it has nothing to do with the rest of the content I put up everyday. Regardless, I have put this up the past two years and think it’s time again to share with you (and I know Alicia already made a batch!). Let me introduce you to my favorite treat, pretzelies. If you like sweet and salty like I do, then I think you might get hooked!

Pretzelies Recipe
Ingredients
1 bag of Snyders pretzel snaps (or generic brand square grid pretzels)
1 bag (or more) of hershey kiss hugs, caramel filled kisses and/or peanut butter filled kisses
1 medium bag of holiday colored M&Ms
Sea Salt

Directions
1. Preheat oven to 350 degrees.
2. Spread the pretzel snaps evenly across the cookie sheet(s) - I keep a bowl handy for the broken pretzels so they don’t go to waste.

3. Unwrap hersey kisses/hugs and place one in the center of each pretzel.

4. Put in the oven for about 1 minute, up to 2 at the most.  You will see the candies getting shiny and you can do a test with an M&M to see if it presses in to the melted chocolate easily.  Note - watch this carefully, if they are in too long they will start to brown.  Also, the caramel kisses take longer and peanut butter kisses tend to take less time.

5. When ready, take tray out of oven and press one M&M on top of each kiss/hug.  I usually do this on top of the stove to keep the tray warm and keep the candies soft while I am placing the M&Ms on top.

6. Take a few pinches of sea salt and sprinkle over tray of pretzelies to increase the sweet/salty flavor (not mandatory but it tastes good!)

7. Put the tray in the fridge and let the pretzelies set - usually only takes 30 minutes or so.

Serve and enjoy!

These make great hostess gifts and are also a lot of fun to make with kids.  I make this with Pat’s nieces and nephews and they always look forward to it because everyone can have a “job” and they are very easy to do. Note - you do not have to use each kind of hershey kisses, but those are the kind I recommend - Hershey Hugs provide the pretty striped look.


{personal photo}

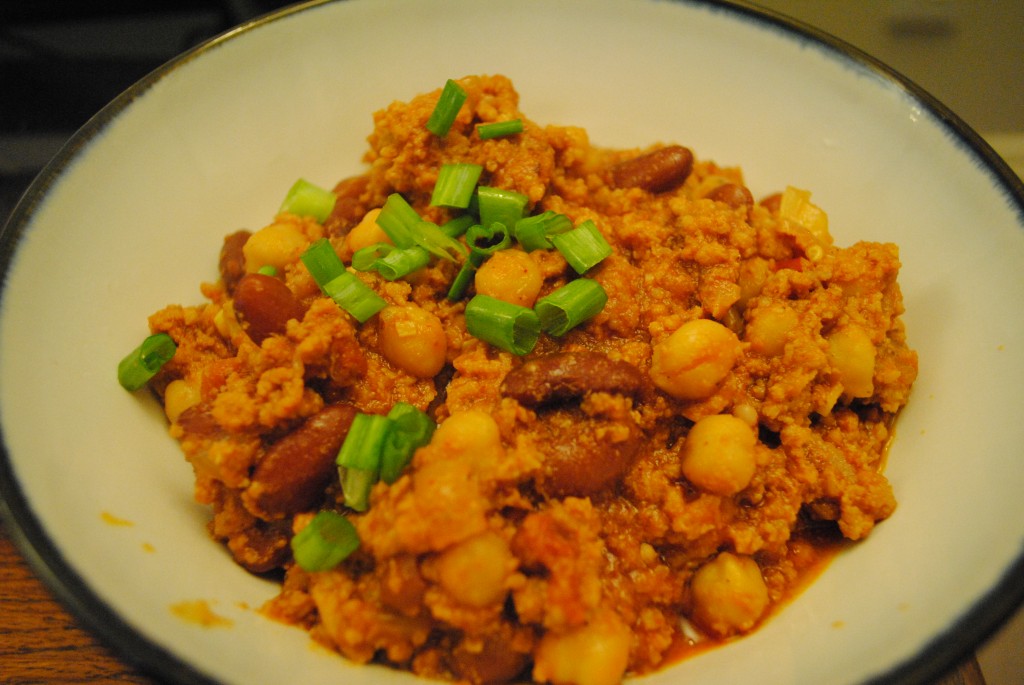
Last November I posted a healthy chili recipe (that was recently modified by Sara over at Life in these Times), and last night I thought I’d try a new version, only healthier. This one is seriously the best chili I have ever had. No joke, you guys - tons of flavor, so easy to make, and healthy. And it only took 30 minutes (though I let it simmer for another 15 minutes or so before digging in). I would like to call it “whatever is left in the cupboard-chili”, because that’s pretty much what I did. Hope you enjoy - it made our rainy evening that much more cozy :)

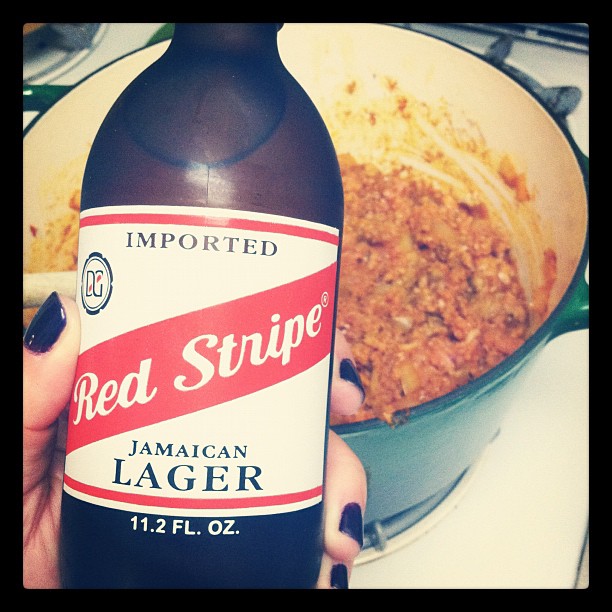
And my secret ingredient? Red Stripe, of course :)

Ingredients

  • 3 tablespoons extra-virgin olive oil
  • 1 medium yellow onion, chopped
  • 5 cloves garlic, chopped
  • 1-2 tablespoons kosher salt (to taste)
  • 2 teaspoons chili powder
  • 1/2 teaspoon cinnamon
  • 1/2 teaspoon cilantro chopped (I used dried cilantro)
  • 1 teaspoon dried oregano
  • 1 small can tomato paste
  • 1 chile de arbol pepper, chopped, with the seeds (I used kitchen scissors and cut over the pot)
  • 1 pound ground lean turkey
  • 3 turkey sausages (I used spicy)
  • 1  (12 oz) beer (I used red stripe because it was in the fridge)
  • 1 (14.5 oz) can whole peeled tomatoes, with their juice
  • 1 (15.5 oz) can kidney beans, rinsed and drained
  • 1 (15.5 oz) can garbanzo beans, rinsed and drained
  • 2 stalks scallions, chopped
  • Optional: light sour cream, shredded cheese (we didn’t even use this, it’s so flavorful you don’t need it!)

Directions

Heat the olive oil in a large, heavy skillet over medium-high heat. Add the onion, garlic, salt, chili powder, oregano, and cilantro and cook, stirring, until fragrant, about 3 minutes. Stir in the tomato paste and the chile de arbol pepper; cook 1 minute more. Squeeze the turkey sausages out of their casings and add along with the ground turkey, breaking it up with a wooden spoon, and cook until the meat loses its raw color, about 3 minutes. Add the beer and bring to a boil, then continue to simmer for about 8 minutes. Add the crushed tomatoes (and juices) and the rinsed beans; bring to a boil. Use the wooden spoon to crush the tomatoes. Cook, uncovered, stirring occasionally, until thick, about 10 minutes.

Enjoy!

modified from food network recipe

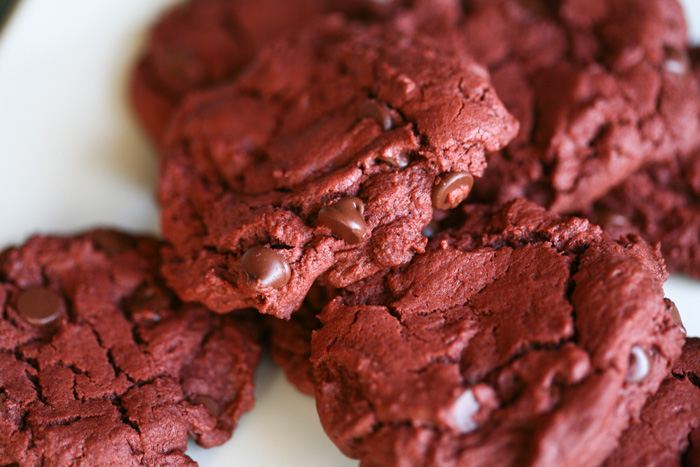
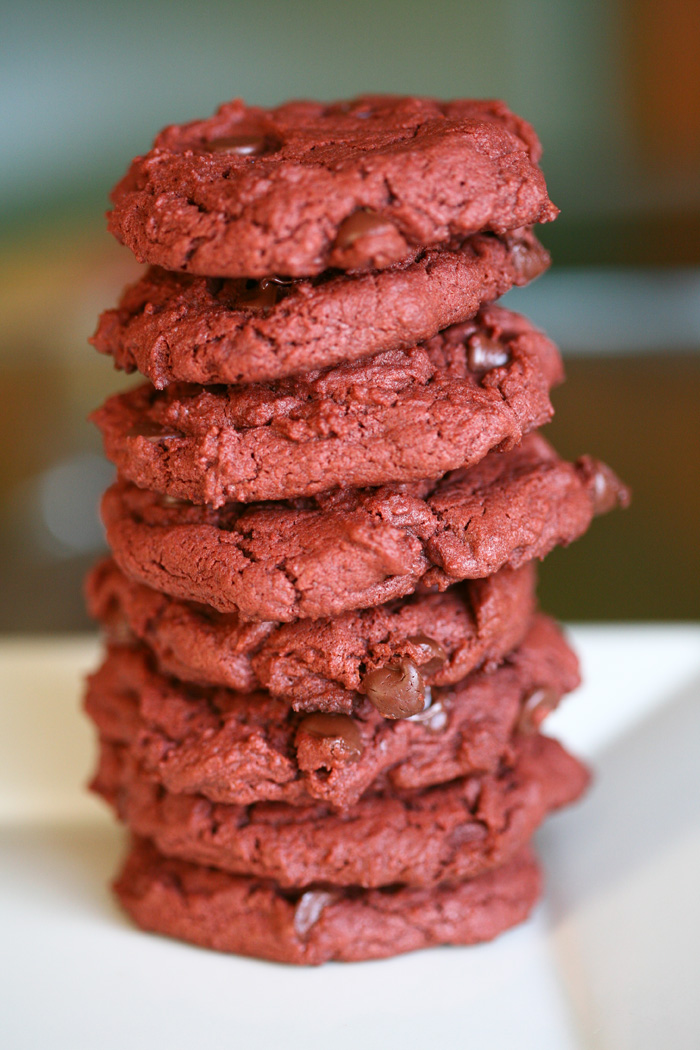
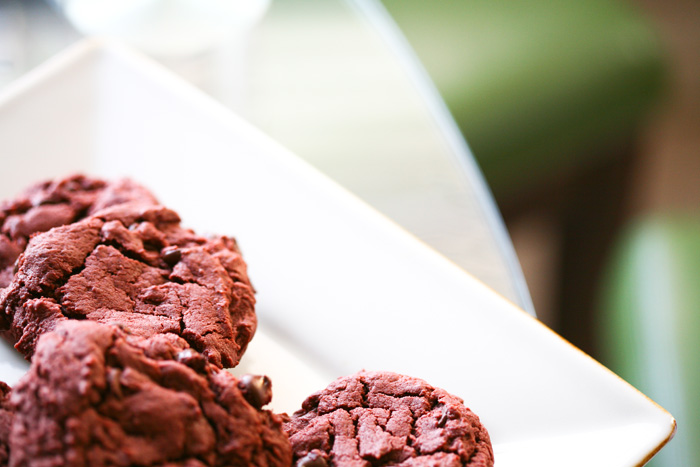
Red Velvet… Yum! Red Velvet cakes, cupcakes, pancakes, whoopie pies, or scones. Whatever form it is in, I love it. So when I saw a recipe for Red Velvet Chocolate Chip cookies, I immediately starting going through my pantry looking for the needed ingredients.

My instincts were right. These cookies are mouth-watering, yummy, amazing-ness that everyone deserves to take part in.

I’ve featured this recipe on my personal blog before, but Jacin and I thought these would make adorable handmade-with-love party favors for LLD readers! For weddings, bridal showers, baby showers, whenever! Another positive, these are easy to make.

How cute would these look on a dessert table, or in favor bags or boxes? Pretty perfect I think!


Recipe adapted from How Sweet Treats
1/2 cup butter
1/2 cup sugar
1/2 cup brown sugar
1 egg
1 teaspoon vanilla
1 1/2 cups all purpose flour
1 teaspoon baking soda
1/4 teaspoon salt
1/3 cup cocoa powder
1 teaspoon red food coloring (I used a little less)
1/2 cup chocolate chips (I added a little extra ;) )

Preheat oven to 375.
Cream butter and sugars together until fluffy.
Add egg and vanilla and combine until smooth.
Beat in red food coloring.
Stir in cocoa, flour, baking soda and salt until just combined.
Fold in chocolate chips.
Using an ice cream scoop, scoop out 1-2 tablespoons of dough and set on baking sheet.
Bake for 10-12 minutes. (Mine only needed 10, and they were perfect!)

All images by yours truly!

Enjoy everyone, let us know if you’re going to use this recipe and how it went! I’m thinking I need to bake another batch soon…

-Camille

Hi everyone! OK so by now you must all know that I love to can - AKA I love to make my own jams, jellies and dill pickles {hence, Jars of Love was born}. Many of you have asked me for the secret recipe, so today I will share it with you, in hopes that you can continue the love and maybe some of you will even venture as far as to make your own favors {if you do, please please let me know!}. My favorite part about this recipe is that it is reduced sugar so you can really taste the natural flavor of the strawberries - most recipes call for at least 7 cups of sugar and this one only uses 1.5 - 2 cups!

So, without further ado, I give you Canning 101: Strawberry Jam!

You’ll also need a large stockpot (or canner) and 6-8 1/2 pint or 12 4oz. canning jars with lids and seals. Additionally, you can add 1 teaspoon of butter to reduce foaming.

Sanitize jars by submersing in boiling water (or running through the dishwasher), then place upside down on cookie sheets to dry. Do not put the seals in the dishwasher, only the jars!

This is the most tedious part of the process; hulling the strawberries! What you need to do is cut the stems out of the strawberry at the top, removing the flavorless hull. It takes a bit of time but I’m told there is a little contraption that could make this faster. Someday I will spend the $3 to get it and make life easier but until then, I’ll continue to painstakingly remove each one.

…or a potato masher, or a blender. But the hand blender works best for me, and creates a perfectly even consistency.

I squeeze the lemons in to a small dish to remove seeds before pouring in to strawberry mixture, and then slowly add the pectin while stirring quickly with a whisk to reduce clumps. Next I add the butter, because recently this has really helped reduce the foaming during the cooking process.

Make sure you are constantly stirring at this point - you don’t want your hard work to be burned to the bottom of the pot! Once the jam comes to a boil for a full 3 minutes, add the sugar.

…and bring to a rolling boil again for 3 minutes, constantly stirring.

By “can” I mean put the jars fully submerged (with the water an inch or so above the tops) in boiling water for 15 minutes. Once the time is up, remove from water and place on a cookie sheet or dish towel, wiping lids dry. Let them sit for 12-24 hours - you will hear a “popping” noise from the seals letting you know they are done (meaning you can no longer press the center down with it popping back up).

That’s it! In total, it probably takes about an hour or so, depending on how fast you can hull the berries. Once the jars have sealed, they are good for up to a year, and once opened, good for at least 6 months if refrigerated.

Any questions? Let me know, I’m happy to help!

© lovely little details

{recipe girl}

In the spirit of the holiday weekend and gatherings with friends and family, I wanted to share a favorite recipe that I bring to our family’s picnic every year - watermelon salsa. It is literally all the same ingredients as regular salsa, but swapping the tomato for watermelon! It is always a hit and has been requested year after year - hope you enjoy!

Ingredients:
1 small watermelon
1 medium red or yellow onion (red onion will add a spicier flavor)
cilantro
1 jalapeno (seeded)
2 limes
2-3 cloves garlic minced
salt and garlic salt to taste

Scoop out watermelon (save one half to use as a bowl) and finely chop, placing chopped pieces in a strainer in sink. Finely chop all other ingredients, adding cilantro, jalapeno and salt/garlic salt to taste. This is where a vidalia chopper comes in handy - it’s kind of the best thing ever, and makes all of the pieces uniformly chopped. Combine all ingredients and serve in empty half of watermelon or a pretty bowl.

Note - I serve in a watermelon every year and people still think it’s regular salsa :)

Have a safe and enjoyable LONG weekend! LLD will return on Tuesday :)

(c) lovely little details

Can you tell I’m in quite the festive mood lately? I say bring it on, 4th of July - I’m ready! Though our lovely heat wave only lasted a few days here in San Francisco, it’s ok, I will continue my quest for warm weather as long as I need to. And in the meantime, I’ll just keep looking for beachy inspiration to keep me happy.

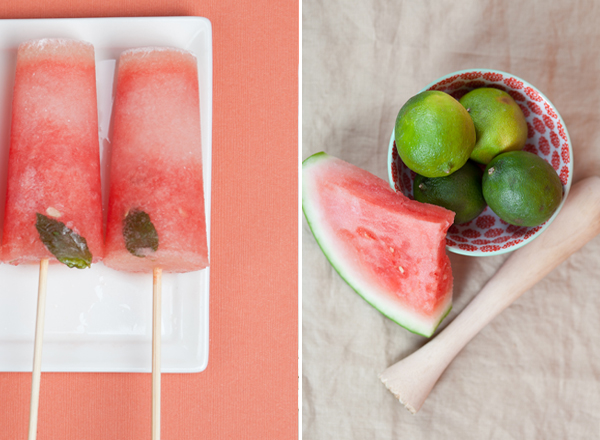
So today I was thinking about a twist on the modern signature cocktail, especially for you summer brides, where it may be a hot little afternoon before guests head in to the reception. So what about a frozen treat, like these Watermelon Mojito Popsicles created by the ever-so-talented {and creative!} Sugar and Charm. Personally I can think of nothing better than these fun little frozen alcohol treats - and you could make non-alcoholic versions too, for the kiddies or those not choosing to participate in frozen libations.

Sounds pretty refreshing, right? Head on over to Sugar and Charm for the recipe and the how-to for these refreshing little treats. In the meantime, I’m getting ready for a very special wedding this weekend, for Jenny & Jason {yes, the groom has the same name as me :)}! Catch you back here tomorrow!

Happy Wednesday!

{phone camera pic, taken at Netties Crab Shack}

Happy First Day of Summer! Hope you are all out enjoying the heat!

In honor of one of my favorite days of the year {did I mention I LOVE summertime?}, I wanted to share a quick cocktail recipe that I happen to love - the Tequila Daisy.

Ingredients:
2 oz tequila
1 oz lime cordial
1 oz fresh raspberry juice

Mix all ingredients, shake, and serve with a lime sprig; you’ve got yourselves a cocktail! This could be a perfect way to incorporate pink in to your signature cocktail if you’re looking for a tequila drink :) You can also add a little club soda if preferred.

Enjoy!

featured and seen in
   | Web hosting and development: The Hosting Guide