header
blog


You just got back from your honeymoon and you are feeling happy the planning of your wedding is over! But wait, there is one more thing to do-send out your thank you cards. It is often the most overlooked component of your wedding but is extremely important. You do not want to miss the opportunity to show your guests how much you appreciate them for joining you in your very special day.

Response time:
The number one question is “When should they be sent?” Brides and grooms should wait no more than 6-8 weeks after the ceremony to send their wedding thank you cards, but of course the sooner the better!

If you receive gifts before the wedding feel free to send the thank you cards out as soon as you get them. If you have over 100 guests attending your wedding you can imagine how much time this will take so get ahead! It also helps to make a goal and send out so many thank you cards a day.

Another tip for speeding this process up is to order your thank you cards when you order your wedding invitations. They don’t need to match but if you purchase them with your wedding suite it will present a more cohesive look and you won’t need to go back later to order them.

The contents:
Sometimes this can be a daunting task for couples but make sure to greet the guest, express your gratitude, be specific about the gift, and take them for attending (or for thinking of you if they couldn’t make it). It is also nice to make specific examples of their gift and tell them how you use it. For example, “I love making my coffee every morning in the machine you got us!” Oh, and always make sure you spell their names correctly and are including the right gift for the right person.

For monetary gifts, it is not necessary to mention the specific amount but simply say “thank you for your generosity.”

Make sure to also send thank you gifts to people who attended but did not bring a gift and also always remember to send thank you cards to your vendors for helping with your beautiful event.

Addressing and Sending:
For families, address to Mr. And Mrs. If you are close with them use their first names inside the card or if you are not that close use the same salutation inside.
Make sure to hand stamp every note as prepaid postage techniques are too impersonal.

Once you follow these basic etiquette tips sending out thank you cards should be a breeze.

Be sure to check out some of my favorite thank you cards from Wedding Paper Divas, and, if you enter the code FSALL you’ll get free shipping on your orders (for a limited time).

{partnered post}

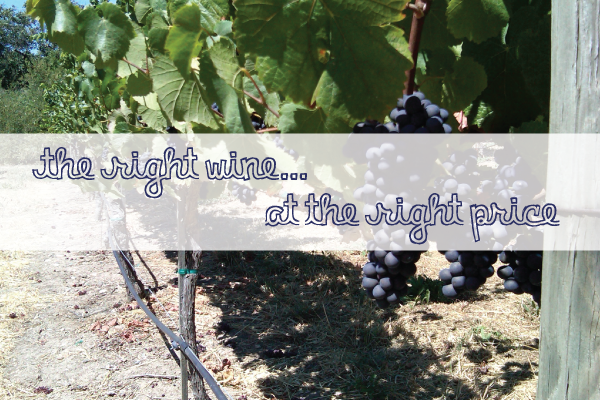
Today I thought it could be helpful to provide you with insight from a wine professional to help you choose the right wines within each price bracket for your big day, or even for just a weekend get-together. So I invited Mark Bosko, direct sales manager {and groom-to-be} at Colene Clemens Vineyard {a private winery in Newberg, Oregon}, to share some advice and recommendations on choosing the right wine at the right price. Have any questions for the expert? Leave a comment {or send an email} and we’ll make sure to respond!

{personal photo}

From Mark: As a recently engaged wine professional, I am now spending less time on the internet researching wines by myself and more time researching wedding ideas with my fiancé. Believe it or not, this has been a very refreshing experience. I feel this way not only because my fiancé is my best friend and I love spending time with her (I set myself up for that one), but also because I am finding that wedding blogs are written by genuinely positive people looking to provide help, while wine blogs are almost always written by genuinely condescending people looking to inundate you with their opinions. With that said, I have created this post for two reasons: first to prove to you that not all “winos” are self centered snobs, and secondly (and most importantly) to help you find the perfect wine for your wedding without breaking the bank.


{Kristy Huston Photography}

If you are going to offer wine at your wedding, I really do think that it is important to include at least one white wine and one red wine. I am always surprised by the number of people who refuse to drink either one or the other. Unfortunately they exist and at a wedding we must cater to them all.  Listed below I have categorized a few of my favorite value wines by price range. Within each category you will find a few different styles of white and red wines that will hopefully not only appeal to you and your budget, but also your wedding party, extended family, friends, neighbors…etc.

Less than $10/bottle :

Wines that are priced under $10/bottle are generally mass produced in large facilities so that they cost less to make.  To make this possible, they are usually made from blends of grapes grown in much broader areas (i.e. California or Australia) rather than a more specific area (i.e. Napa Valley, California or Barossa Valley, Australia). You will find wines of all types in this price range, but listed below are a selection of wines that I think have the most quality for the price.

Pinot Grigio (Italy) – There are a number of different regions in northern Italy that make an affordable version of this delicate white wine. The regions of Friuli and Trentino-Alto Adige are among the best and with a little time and energy you should be able to find a few of these wines that are priced less than $10/bottle. These are lighter styled wines that finish with bright acidity and pair exceptionally well with lighter seafood dishes.

Verdejo (Spain) – If you enjoy Sauvignon Blanc and are looking for a less expensive option, look to the Rueda region of Spain. Verdejo is the grape and it tends to be a light to medium bodied white wine that is more floral than fruity.  This is a very refreshing wine that is great in the summertime.

Torrontés (Argentina) - Although Torrontés is still a fairly obscure varietal, it is arguably the most popular white wine made in Argentina.  They may not be the easiest wines to find here in the United States, but they are well worth the extra effort if you are looking for value. This would be a great alternative to a Chardonnay because they iare usually medium bodied, very aromatic and can pair really well with food.

Shiraz (Australia) – There is so much Australian Shiraz on the market that they have become very, inexpensive. These wines are typically packed full of dark fruits, oak and spice.  There are a lot to choose from for less than $10/bottle, so I would highly recommend buying a few different producers so you can taste the difference and see which labels you like best.

Carmenere (Chile) – In the glass Carmenere can look almost black in color and as its color suggests, it expresses a lot of dark fruit characteristics.  These wines are known for being big and juicy. This is a great red wine if you are looking to spend around $10/bottle.

Malbec (Argentina) – Similar to Shiraz and Carmenere, Malbec is another dark wine that can be a great value for just under $10/bottle.  Close your eyes and imagine a glass of deeply colored wine that smells and tastes of concentrated dark fruits such as blackberries, plums, blueberries…you get the idea, right?

$10 - $20/bottle:

For $10 to $20 a bottle you can find some really well made wines and unfortunately some really poorly made wines as well.  When shopping for value in this price range, my advice would be to look for International wines (both white and red) or more specifically Domestic whites (from California and Oregon).  In this price range the difference of a few dollars can make a huge difference in quality, but don’t be fooled into thinking that you are always getting a deal when an $18/bottle of wine is discounted to $12/bottle. There is usually a really good reason why that wine is heavily discounted and it is because the quality of the wine was not worth the original price tag to begin with.

Chardonnay (California) – Although you can find Chardonnay from California for less than $10/bottle, I wouldn’t recommend it. This is not a wine you want to go cheap on, but once you enter the $12+/bottle range they start to become much more interesting. Always remember that Chardonnays made in stainless steel are usually lighter in style while those made in oak tend to be more full bodied.

Pinot Blanc (Oregon) - Pinot Blanc is one of my favorite white varietals grown in Oregon because they are crisp and clean, with subtle aromas reminiscent of stone fruits (peaches, apricots, nectarines). Another great thing about these wines is that some of the best and most expensive bottles tend to cost no more than $18. This is a great choice if you are looking for a lighter styled white wine with little to no oak influence.

Sauvignon Blanc (New Zealand) - You will find Sauvignon Blanc (SB) grown all over the world, but if you are looking for value, look for SB from New Zealand. With that said, as much as I enjoy these wines, I have learned that they do not always appeal to everyone. They tend to have a unique array of herbaceous aromas and flavors, so I highly recommend trying these wines before committing entirely to them for your wedding.

Tempranillo (Spain) – There are a number of regions in Spain that produce Tempranillo based wines. Some of these you may have heard of before (Rioja, Ribera de Duero), but my advice would be to look to the lesser known regions of Castilla - La Mancha, Tierra de Castilla and Toro to get the most value.  These wines should be light to medium in body, display fresh fruit characteristics and have a nice smooth mouth feel.

Languedoc (France) – The Languedoc region of France is the single largest wine producing region in the world and because of this you will find wines at every price point. The value red wines produced there are not specific to a single varietal but are instead blends comprised of a few different varietals (i.e. Syrah, Mourvedre, and Grenache). They are medium bodied wines and have flavors and aromatics that remind me of dry rub spice blends that you grill meats with. Did someone say barbecue?

Zinfandel (California) – I have had the opportunity to taste various Zinfandels produced in California that cost over $40/bottle and those that cost around $15-$20/bottle.  Although there is a noticeable difference between the two, I am always pleasantly surprised by the quality that you get for less than $20/bottle.  To me they are consistently full bodied wines packed to the rim with dark, jammy fruits.  As comic book heroes go, this wine is less like Spiderman and more like the Incredible Hulk.

$20/bottle or more:

As I mentioned above, you do not need spend more than $20 to enjoy a good bottle of wine. With that said, I am from Oregon and a huge advocate of supporting local wines, so…if you can afford to spend more than $20 on a bottle of white or a red wine for your wedding then look no further than the Chardonnay and Pinot Noir from the Willamette Valley. These are two extremely versatile wines because they will taste great with or without food.  The Chardonnays from this region are light – medium in body and have highly perfumed aromatics reminiscent of tropical fruits (melon, pear, peach), while the Pinot Noirs from this region are also light – medium bodied, but instead express a combination of red (cherry, raspberry) and black fruit characteristics (blackberry, black cherry).  When it comes to finding some of the best value whites from this area, seek out these producers: Chehalem, Adelsheim, Elk Cove and Westrey. And, when it comes to finding some of the best and most affordable Pinot Noirs from this area, look for wines from these producers: Crowley, Brooks, Ayres and of course where I work at Colene Clemens (I obviously set myself up for that one too). Also, don’t be afraid to contact these wineries directly if you can’t find them in your local wine shop. Not only will they be able to ship their hard-to-find wines directly to you, they usually offer additional discounts on your purchase.

{Colene Clemens Vineyard}

In closing, the world of wine can be a very overwhelming and complicated place.  Just when you thought you found your favorite grape varietal (i.e. Chardonnay), you later find out that you don’t like every Chardonnay out there. The characteristics of a wine will always be different depending on climate, soil and each individual winemaker’s style. To make matters even more confusing, everyone’s perception of wine is different. What does this all mean? To me it means that there is no fool proof way to generalize the styles of wine produced in a given area or to know ahead of time exactly what you will like or dislike. With that said, I tried my best to give you a place to start, but in the end you should always taste wines yourself, keep an open mind and learn from experience.

Cheers!

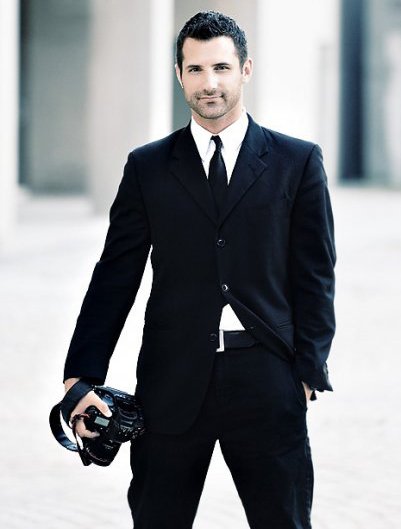
I know, ladies, he’s not too shabby to look at on the other side of the lens, either!  Today I’m so excited to have my dear friend Steve Depino (you might remember him from this post) visiting the blog to give some first-hand tips from the photographer’s point-of-view.  I’ve known Steve for years now, we’re from the same hometown & we have a mutual friend who introduced us and through the years have kept in touch. Steve is a GREAT guy and just a fun person to be around - did I mention he is one of the most talented photographers I’ve ever come across? Seriously - I used to go check out his blog when looking for inspiration for my own wedding, and even as far back when I was daydreaming about the day I could start planning.

I did a mini interview with Steve in hopes to provide all of you with some valuable advice, so here we go:

Your experience:
Professional wedding, event and celebrity portrait photographer for close to 10 years.

How you got in to the industry:
I started out as a staff photographer for a local newspaper. I covered anything from baseball games to bake sales in a given day. I didn’t make much money at that job so as my friends and family members started getting married I would start taking photos during their weddings and give them those wedding photos as gifts. My business grew from those experiences.

Your top tips for the bride in planning for her wedding day photos:
Find the right photographer for you: It’s great to have recommendations from a friend but be sure to meet or at least speak with your photographer. You want to see if your personalities and vision for your wedding photography mesh. After hiring them, tell your photographer why you are hiring them. It might be their creative style of portraits, their unobtrusive style or maybe their personality. I find these little notes very helpful so I know what the client is looking for on their wedding day.

Do an engagement session: If at all possible, do an engagement session with your photographer. You will get a good feel of the way they work, therefore you will be more comfortable with them and ready for your wedding day photos. You will also get some amazing photos of you and your fiance that you can use in numerous creative ways for your wedding and beyond.

Give your photographer a realistic amount of time to work: Only giving your photographer 10 minutes in between your ceremony and cocktail hour to fire off amazing photos of you and your new family usually isn’t going to be enough time to even organize those photos let alone shoot them.  Make sure you allow enough time between the ceremony and reception (or beforehand) to capture the photos that are on your “must-have” list.

Cut down your group photo list: This part of the day can be a high stress point for both you and your photographer. You want to get your photos done, your cheeks are in pain from all your fake smiling and you want to get to the creative photos you really paid your photographer to take. Your photographer is stressed because they are on a count down to cocktail hour and want to deliver great creative images for their clients. So try your best before the wedding day to put together a group photo list on paper. If you look at your list and say to yourself “boy this looks like a lot of group photos” chances are you are right. Try to combine some your groups down to a more reasonable number.  Once you have gotten your list down make sure those people know that they are going to be in photos. A good time to tell them is during your rehearsal dinner. It will be fresh in their minds the following day at the wedding and should cut down on tracking people down for group photos.

Let your photographer be the photographer: I always let my clients suggest locations that they think might be good photographs but I also love going off the beaten path to capture images. So keep an open mind when your photographer makes a suggestion of a location. They are probably seeing something very different from what you are seeing right in front of you through their camera.  Reassure yourself during the shoot that you hired a photographer who takes pictures you love, and trust them to do that job on your wedding day. You may not believe what great photographer can do with with a location that at first glance might not be what you consider beautiful.

Steve is located in Guilford, Connecticut and has been featured in Style Me Pretty, The Knot, Billboard, Rangefinder, Modern Bride and has taken photos for the NFL among many celebrity shoots.  For more information on Steve, visit his website, blog, or Facebook page.

When the time comes to start talking guest list, things can get a bit tricky depending on a) who is paying for the wedding, b) how many people can your venue accommodate, c) his list vs. her list, etc.  No matter what, there will always be some sensitivity regarding the guest list but I do have some tips in the form of a template that will hopefully make the process a bit smoother for you.  I created this when I planned my own wedding and have since tweaked slightly for the use of my bride clients, and now I will share with you, too :)

Click the image above or here to access the google doc.  Below are some helpful tips to navigate this document (and the process overall)

1 - in my opinion, it’s so helpful to keep everything in excel in the case that you may be mail merging some of your print pieces, if you are doing anything yourself.  You can also easily sort columns by Yes/No/Last name, etc. to easily navigate through your list and prevent duplicates.  This list also comes in handy when it comes time for the bridal showers, etc. because you can just forward the list to your bridesmaids/family.  And after the wedding, the list stays handy because you now have a master address list for all friends and family for the sake of holiday cards, etc.

2 - you’ll note that there is a column on here called “Invite #”.  As you are preparing to send your invites in the mail, I highly recommend that you write a tiny number on the back of each response card that corresponds with an invitee in your excel list.  This way, if a guest returns their response card without a name {yes, it has happened!}, you can look back at your grid and determine who that person is without having to guess by handwriting.

personal photo

3 -  speaking of RSVPs, the grid can easily count the number of people with an auto format at the bottom so you always have a go-to actual number of guests for quick reference.  When you get an RSVP in the mail, just add it to your grid and you’re all set.  Additionally, in our case, we asked guests for music requests, so I added an extra column to track requests.

3 - all dietary restrictions and special requests can be tracked in one place, and associated with each person.  This comes in handy when it’s time to make your seating chart so you can tell your venue exactly who needs the vegetarian meal at table #10.

4 - all gifts and thank-you notes can be tracked in one place.  Trust me - when those gifts start piling in, it will become hard to track who got you the silverware vs. the china platter {of course you appreciate every single gift but when they start coming in, or after the shower, it is SO helpful to have all of this info handy}.  Also, the columns are formatted to add the sum of total cells, so it also counts the $ so you can keep track of this as well, before you head to the bank to make any deposits.  When we traveled on our honeymoon I printed out this grid so I could work on my thank-you notes, and literally check down the list as each one was completed, ensuring no thank-you was left unsent.

5 - seating arrangements…  ahhh…. seating arrangements.  First off, please learn from me and DON’T save this task until 3 hours before your rehearsal dinner :)  This grid can be very helpful when it comes time for seating arrangements.  All you need to do, now that you have your master list of who’s coming, is print the grid and cut out each person.  You can then start to group people together based on #people per table, etc., comparing to the room diagram that your venue will provide.  I just took a small notepad and put a piece of paper to represent each table in the room and started gluing peoples names to each table.  No matter how you decide to do it, it will just be helpful to have a master list to go from!

personal photo

As in the case of any file like this, of course you will likely end up making changes that suit your needs, but at least you’ll have something to go from.  Hopefully this helps you a bit!

Lastly - if you haven’t popped by the google wedding docs yet, you should!  Along with a similar template to mine, you will find everything from budget sheets to checklists to wedding website makers and more.  Check them out here.

For more “Bride Guide” tips, click here.  Have some bridal insight you think others would find beneficial?  Contact me and I’ll include in a future post!

PS - stop back later today for another Bridal Fitness post from Jonny!

pom pom image from Prost to the Host

One of the most common questions I’ve received lately is “how did you make your tissue poms”?

Well, my friends - I didn’t make them!  I ordered them from etsy (Prost to the Host), and although I was so tempted to make these beauties myself, I convinced myself (ok, fine, my bridesmaids convinced me!) to order them instead!  You can see my original post here, and here to show the poms before and after.  The only work we {my bridesmaids} actually did was de-fluffing the poms the day before the wedding!

Long story short, you may feel the pressure to do it all yourself or find it hard to let others help you but please know that it’s OK to ditch the DIY sometimes in order to take the easy route!  And sometimes, the easy route comes out to be less expensive than the DIY route would have been, which gives you some peace of mind as well :)

Have any Bride Guide tips to share?  Contact me and I’ll include in a future post!

I am crediting Dancy for the idea behind today’s installment of the Bride Guide, she actually did this on her honeymoon and I thought it was genius!!
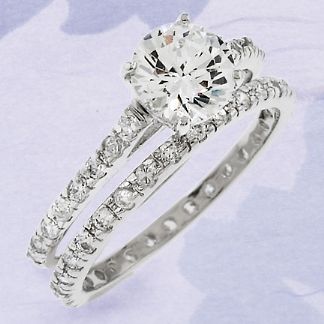
So you’re headed on your honeymoon, and whether near or far, or how extravagant your vacation may be, you might still find yourself worrying about the security of your engagement ring and wedding band during your trip.  Well, if you are really worried about it, and think you might end up leaving the rings behind in the safe one day (or at all), and you’re scared of theft, you should do what my good friend Dancy did: buy a replica ring set and leave your real rings safely at home!

At times during our honeymoon in Hawaii, I wished I had done this because I ended up snorkeling with my left hand in a fist to make sure my rings wouldn’t come off, as I was too afraid to leave them behind in the hotel safe.  I have never really taken my rings off and I wasn’t about to start a trend while on vacation!
glitzs.com - $35.99
You know you’ve seen them at Claire’s, Forever 21, and even TJ Maxx - and at such a low price, it totally makes sense to just grab a nice little “replica” set of your own.  While nothing will ever replace the real set, these decoy rings will be the perfect stand-in and you won’t be heartbroken if they sink to the bottom of the ocean!
Thanks Dancy for the great idea!
source

Today’s Bride Guide Tip is simple - if you don’t like it, try again!  This can relate to several wedding planning components but what I am mostly referring to is your hair and makeup trial.  You want to look your best on your wedding day - don’t be afraid to tell your stylist that you don’t like what you see.  Even for those who do not like confrontation, this is one of those times when you just need to speak up!

Easier said than done, I know, but trust me on this one.  You may need a few trials before you find the look that is perfect for you, but in the end, you’ll feel even more comfortable and confident on your wedding day when you’re happy with how you look!

the lovely Jennifer Hodgins with Katie Couric and Linda McMahon {source}

I’m very excited to have the amazingly talented Jennifer Hodgins of Branford Flower Shop in Branford, CT (you may remember me praising her in previous posts, as she was the florist for my wedding!) here for today’s afternoon segment of the Bride Guide.  I asked Jennifer a while back if she had any advice for brides when it comes to choosing flowers for the big day, and she provided me with the following:

  1. To help save $$, choose flowers that are in season at the time of your wedding.
  2. Select the color of the bridesmaids’ dresses before visiting your florist.  Their dress color influences the bouquet colors, which help determine which flowers to use.
  3. Bring pictures and color swatches of individual flowers, bouquets, pew decorations, table arrangements, etc. so the florist can not only hear, but see, what you like.
  4. The florist will suggest flowers that fit your personality and wedding style.  As an example, if you’re a free spirit bride having a ceremony in the park, a tight bouquet of all white roses is probably not for you.
  5. Start visiting florists at least 6 months prior to your wedding.  Many florists offer a free consultation.
  6. Be prepared to make a deposit and sign a contract when you book the florist.  Most florists deduct the deposit from the total due.
  7. Tell the florist what your flower budget is.  This helps the florist create an estimate that’s realistic for you. Knowing how much you can spend is key to flower selection, table arrangements, etc.
  8. Be open with your florist.  Be honest about your preferences, including colors and flower types, what you won’t accept, and anything else that would be helpful in designing your flowers.  Mention any flower allergies, too.
  9. As your wedding day gets closer, you and your florist will review your schedule, e.g. where and when to deliver the bouquets, corsages, boutonnieres, ceremony flowers, etc.
  10. If, after meeting with a florist, you don’t feel comfortable with that person or shop, consider someone else.  It’s important you have a good working relationship with your florist.  There are so many things to stress about - your florist should not be one of them.
Thank you Jennifer!

Seriously.  Make tripadvisor.com your new best friend (and no, they are not telling me to tell you this!)  TripAdvisor is the best thing EVER when it comes to giving your honeymoon hotel a background check.  Filled with travel advice from recent travelers, real photos, and ratings based on real experience, TripAdvisor is so very helpful to reference when deciding on your honeymoon hotel, and even for your wedding room blocks at local hotels.

Before booking any vacations blindly, I always reference this site and have found it to be really helpful!

Happy planning!  :)

This is a re-post from the holiday week that I thought would be a perfect supplement to today’s “tuesday tips”.
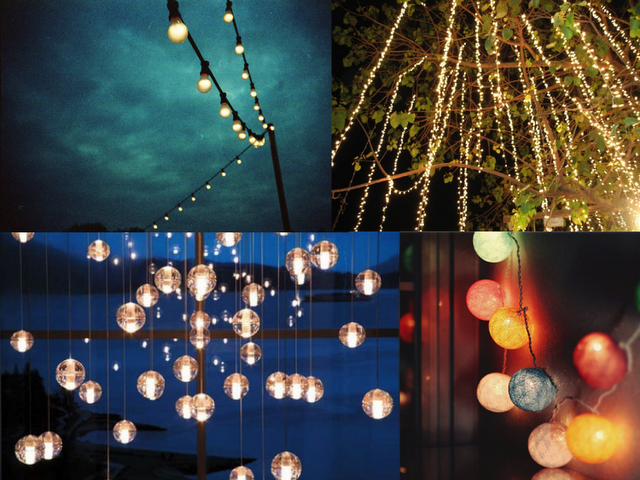
With the holidays over :(, all the returns will be happening in the next few days - which means, to you brides who are looking for twinkling lights at your wedding, this is YOUR time to get out there and purchase lights!!  During this time, strands of holiday lights are going to be significantly reduced in price so make sure you head out and pick some up this week!
In the spirit of twinkling lights and sparkling accents, here are a few images I pulled from one of my pinterest boards :)
Images from: blog.flicker.net, andrea-marie.org, photos.ibibo.com, fallwedding.tumblr.com, luxist.com, honeyandjam.com, cottage living.
Happy Tuesday!
featured and seen in
100 Layer Cake Snippet & Ink See my work featured on Ruffled