please please please go check out this amazing blog, green eyed monster, that i stumbled upon a few months ago - i’ve been a loyal reader ever since!! thanks so much to ashley for doing today’s guest post after i came across her amazing pumpkins yesterday and immediately contacted her to see if she could do a re-post on my blog! october brides, wouldn’t the lace pumpkins be amazing to add to your wedding decor?
thanks ashley!!
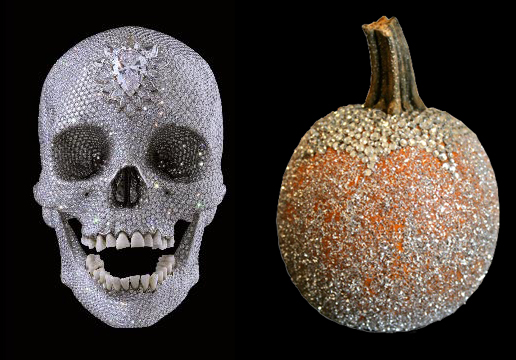
Pumpkins don’t necessarily mean that one has to muck up their nails with pumpkin guts, and subsequently carve a cliched face into the skin. Pumpkins can be, dare I say, glamorous, and a brilliant means of decorating for special occasions or just sprucing up a home with a unique perspective. Here are two DIY projects that take pumpkin decor to the next level. One of the designs requires all of a 5 minute time commitment, while the other is for those with the patience of a saint or some compulsive tendencies.
For more pumpkin decor ideas, check out this post, complete with inspiration board for the project. For weekly DIY projects, and for daily giveaways of handmade goods by independent artists and designers, drop on by Green Eyed Monster where Ash & Kimmy serve up the greatest in enviable living, 365.
Materials:
Pumpkins
Stockings/tights with interesting pattern or designs
Elastic for tying
Directions:
1. Stuff pumpkin in toe of stocking and stretch the stocking around the pumpkin.
2. Cut stocking at tip of stem.
3. Use elastic to tie off stocking at the base of the stem.
4. You now have pumpkins fit for a lady!
Small, smooth pumpkin
Tiny white crystals
Glue gun
Tweezers
Paint brush
Adhesive wet glue
Glitter
1. Fire up the glue gun and begin slowly but surely using the tweezers to hold the crystals, apply glue, and stick to the pumpkin, starting at the stem and working outward in a circular motion.
2. I gave up aspirations of covering the entire pumpkin in crystals after 5 hours of gluing, so I tried to make the crystals look like a leafy base around the stem. If you make it all the way, KUDOS TO YOU!
3. To cover up the remaining pumpkin skin (for those of us lacking the patience or time), use a paint brush to apply wet glue adhesive (Modge Podge) to the non-bedazzled pieces of the pumpkin.
4. Then dump lots and lots of glitter onto the wet glue and allow to dry.
5. Enjoy your pumpkin BLING BLING!


{ 7 comments… read them below or add one }
These are super cute, but to be completely honest…to me the most fun part of pumpkin carving IS the mess! And roasting the seeds that you dig out…yum!
WOW! so fabulous!
WOW! so fabulous!
WOW! so fabulous!
WOW! so fabulous!
WOW! so fabulous!
WOW! so fabulous!