From Jacin: Today I am excited to introduce the lovely {and crafty!} bride-to-be, Chelsea of Chelsea Gets Married and two twenty one to share a DIY peony topiaries post that she recently put together. This is so pretty and simple and I really think you will love it! Thanks Chelsea for stopping by {and can’t wait to have you back again soon!}
Let me start by saying a big “thanks!” to Jacin for letting me be a guest blogger. I’ve been following her since lovely little details was she said yes and she was enjoying her Hawaiian honeymoon. Lucky!
Hi, I’m Chelsea! My fiance, Brad, and I are getting married on June 25, 2011. I started blogging in the fall of 2010 with my wedding planning blog, Chelsea Gets Married. Then, in February, I started my DIY project, home improvement, and basically after-the-wedding blog, two twenty one.
When I started planning our wedding I wasn’t planning on DIYing a ton of stuff. But when I realized how much things cost I started making a to-do list for myself. By DIYing, you’re saving money {if you do it right}, and you have a sense of pride and accomplishment by creating special pieces for your wedding. And that’s a pretty amazing feeling.
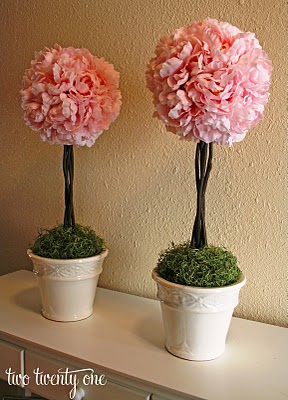
Now onto the tutorial that I wanted to share with you today! Brad and I are getting married in front of a large, double-sided, stone fireplace. I wanted two topiaries to flank the fireplace on each side. However, after hearing our florist’s quote for two topiaries, I decided to make my own and keep them after the wedding. I used pink peonies because they’re my favorite flower and the flower we’re using for the wedding, but you could use any full flower of your choice.
I used the following materials and supplies:
- 6 inch foam ball
- white pot
- Silk pink peonies
- Floral foam
- Spanish Moss
- Bundle of 5 twisted willow branches
- Hot glue gun
- Tape measure
- Hedge clippers
- Knife
Instructions for how to make one topiary:
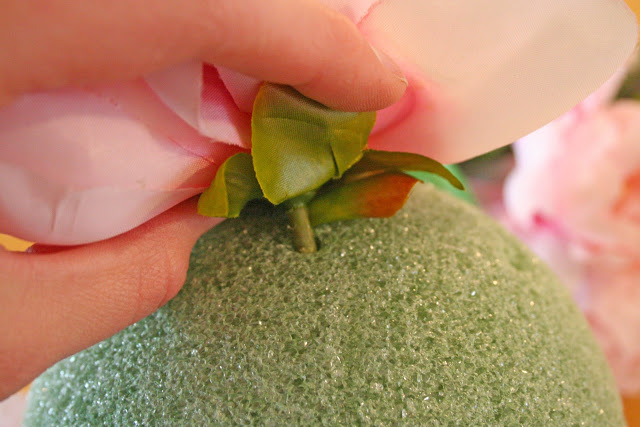
1. Take the peony heads off of the stems.
2. Begin placing some of the peonies in the foam ball to determine spacing.
3. After determining spacing, remove the peonies.
6. Insert 4 floral foam pieces into the pot
7. Determine the center of the pot and insert a bundle of twisted willow branches into the floral foam.
9. With your tape measure, measure 16 inches up the willow branches and make a notch with your scissors or knife.
10. With your hedge clippers, chop off the willow branches above your notch.
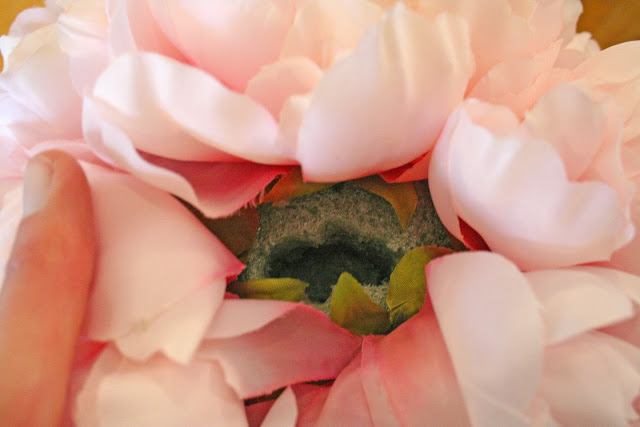
11. Take your peony ball and insert it on top of the willow branches, making at least a 1 inch hole in the foam.
12. Insert hot glue into hole in foam in peony ball and immediately place on top of willow branches.Hold it in place for a few minutes, allowing the glue to dry.
13. Lay the Spanish moss over the floral foam in the pot, covering it so that the floral foam is not visible. If you wish to secure the moss, glue it to the floral foam using the glue gun.
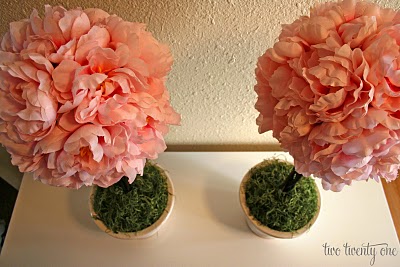
Final Product:
Thank you again for visiting, Chelsea!!
Do you have any favorite DIY posts you’d like to share? Contact me and we can get you up on the blog :)





{ 26 comments… read them below or add one }
So lovely! Now I'm following Chelsea and her DIY projects at {chelsea gets married}.
Sweet feature!
what an awesome tutorial! i could see brides using this for those flower girl flower spheres (um…I clearly don't know what they're called) to walk down the isle with. thanks for sharing!
So beautiful, I love the pink color and the twist of the twigs. :)
oh I love this! I can definitely see them also used for the flower girl balls, like The Eclectic Life mentioned! So crafty and definitely saves some $$$. Great job, Chelsea!
LOVE this!! I may have to try it:)
love!!!
These are great for way more than just weddings, I want them in my apartment just for spring!
such a fun, creative and pretty project.
I love topiaries! This seems easy to do also!
so gorgeous! wow, i love it! it would be awesome to have for decorations around the house too!
Pretty! Would be perfect for a million different things!
Yes! I found what I can use to decorate my guest bathroom! My in-laws are visiting so I can use this! Thanks!
So adorable! Just gave me an idea for my wedding! Thank you!
I adore these-so lovely and feminine!
Love DIY- So pretty Chelsea. Jumping on over to visit your blogs!!
Thanks for stopping by today, beautiful flowers, also love the protea below - reminds me so much of New Zealand, all my faves…
Thank you so much for all the lovely comments!
@theeclecticlife- Yeah, they totally could be used as pomanders! Some people call them flower balls, but I think pomanders sounds prettier. :)
If any of you try this project out and have any questions along the way feel free to contact me! chelsea{dot}twotwentyone{at}gmail.com
SO cute!
These are so cute!
love these! thanks for posting :)
What a fabulous post! These are beautiful!! xoxo
So fabulous!! And it looks fairly simple :) xo
silk peonies! Genius! Hitting up a craft store asap! Thanks for sharing!
These are so lovely…what a crafty idea!
Liesl :)
So adorable!
NIce and workable project =)